Para español
Cool Experiments for Elementary School Kids
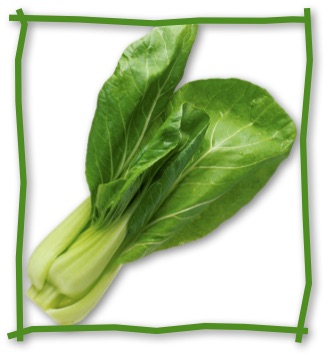
 Are you a curious person? Do you often have questions about things around you? Why are plants green? Why do some plants grow taller than the others? Why some plants live only one year or even a few weeks (like a dandelion), and others live for centuries (like oak trees)? Why some plants have pretty flowers (like roses or carnations) and some (like turf grass in your school lawn) don’t? Why some plants are edible and some are not? And speaking of edible plants, did you realize that usually people eat only some parts of a plant, like leaves of spinach, roots of radish, stems of asparagus, flowers of broccoli, seeds of corn, fruits of an orange tree?
What do you usually do when you are playing outside and it gets too hot, or too windy, or rains too hard? You probably go into the nearest building, or hide in your car, away from all that bad stuff. Now, what do plants do if it is too hot, too windy, or too rainy? Well, for once, plants can’t move (or can they?), so they are pretty much stuck in that bad weather and have to endure everything mother nature puts them through. Then, how do plants make it through and survive (or at least some of them do, the lucky ones)?
Plants developed a number of ways to deal with the harsh conditions and learned to adapt to their environments. For example, plants that live in a dry hot weather (imagine cacti) developed small needle-like or leathery leaves to reduce the loss of moisture into the environment and thick stocky stems to store extra water when it becomes available.
They also “learnt” a trick of “slowing down” their everyday lives until conditions improve: in the hot weather they breathless and they eat less (well, “eat” may not be the best choice of words, but plants do kind of “eat”: they take nutrients along with water from the soil, get gas carbon dioxide from the air, and catch light from the sun to make special building blocks called “organic molecules” that allow them to grow). But how do we know all that?
 To study plants, people not only grew them but also did a lot of experiments, learning many interesting things about plants along the way. Experiments are a fun way to look for an answer to a question or to test an idea. Are experiments only for adults? Not at all! Kids like you have a lot of questions (don’t we all?) and you may be surprised to find out that you are more than able to answer many of the questions by yourself or together with friends and parents! The experiments described in this website/brochure can help you design and perform real experiments. They will help you learn about how plants grow. And the best thing about these experiments is that they are practically free.
“Plant-it-yourself” experiments
What you will need is:
•A packet of seeds (bean, pea, cucumber, tomato, sunflower, corn, pumpkin or squash seeds work great; alternatively a fresh bag of [uncooked!] dry beans will do],
•A bunch of empty plastic yogurt containers or single-use cups,
•A shovel to dig some dirt and an awl to drill holes in the cups,
•[Dependent on the experiment] a few additional things you are likely to find around your house (aluminum foil, plastic wrap, zip-lock bags, salt, baking soda, sugar, vinegar, laundry detergent, dish soap and such).
•And, if you want to be more like a real scientist, a notepad or paper and a pen to take notes on what you did and what you saw.
Ready to start?
Module 1 “Light versus dark” (Level of difficulty **)
Module 2 “Phototropism or growth towards the light source” (Level of difficulty **)
Module 3 “Gravity” (Level of difficulty **)
Module 4 “Temperature and plant growth” (Level of difficulty **)
Module 5 “Soil” (Level of difficulty **)
Module 6 “Crowdedness of planting” (Level of difficulty **)
Module 7 “Water” (Level of difficulty ***)
Module 8 “Pollution” (Level of difficulty ***)
Module 9 “Nutrient storage in seeds” (Level of difficulty ***)
“School yard” or “at home” experiments
What you will need is:
•A bunch of empty plastic yogurt containers or single-use cups
•A pair of small scissors
•Tap water
•A park or a school yard nearby where you can do your experiments or collect plant materials (leaves or flowers)
[Dependent on the experiment] a few additional things you are likely to find around your house (bananas, aluminum foil, plastic wrap, zip-lock bags, salt, baking soda, sugar, vinegar, laundry detergent, dish soap and such).
•And, if you want to be more like a real scientist, a notepad or pape, and a pen to take notes on what you did and what you saw.
Ready to start?
Module A “Wilting of detached leaves and flowers” (Level of difficulty *)
Module B “Nutrient delivery” (Level of difficulty **)
Module C “Aging” (Level of difficulty **)
Module D “Pollution” (Level of difficulty **)
Module E “Photosynthesis” (Level of difficulty ***)